New construction window installation roseville Services
What to Know About New construction window installation roseville
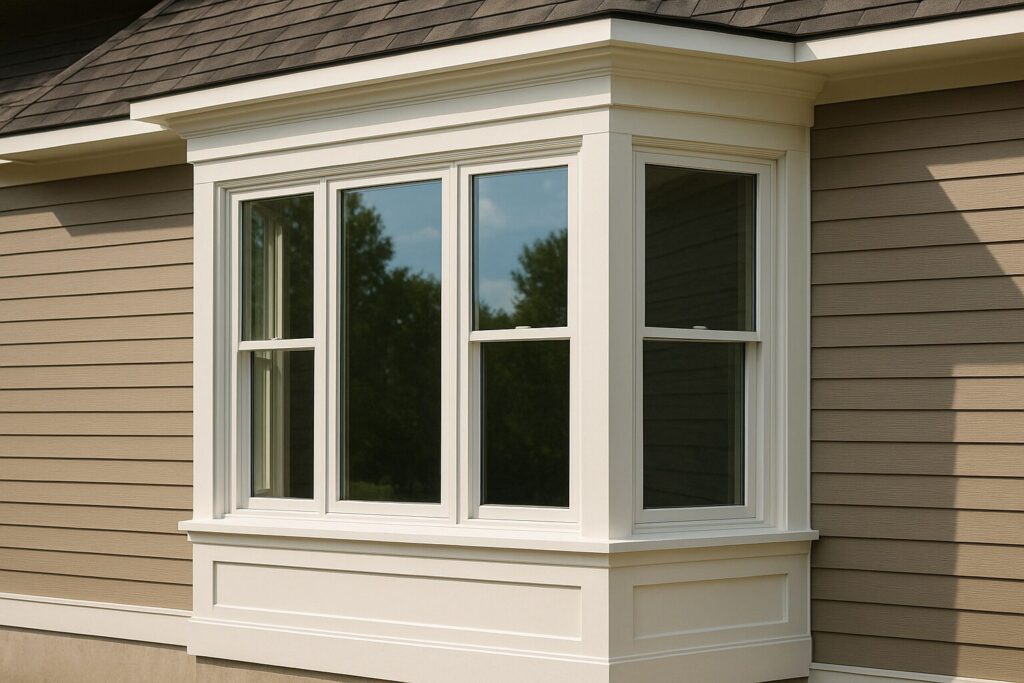
New construction window installation roseville Planning a bay window during a build is one of those decisions that can make a new space feel finished from day one. But “bay window” isn’t a single product, it’s a combination of window units, framing, support, and weather-sealing that has to be integrated into the rough opening correctly. If you’re searching for new construction window installation Roseville, you’re likely trying to align design choices with structural realities, energy performance, and a clean exterior finish that matches your elevation.
What’s different about bay windows in new construction
New construction installation typically uses a nailing fin (or flange) system that ties the window into the wall’s water-resistive barrier and flashing details. For a bay window, that means your installer is dealing with multiple joints, angles, and a projection beyond the wall plane, more places where small mistakes can lead to drafts or water intrusion later. The rough opening has to be sized accurately, the header and jack studs must be correct for the load, and the bay’s seat board and roof (or cap) detail must be planned so water sheds away from the wall.
Because bay windows extend outward, they often need dedicated support. Depending on design, this can be a cable support system, knee braces, or a framed support below, each choice affects the exterior look and the interior sightlines. In Roseville’s hot summers, a bay window also changes solar gain, so glass selection (low-E coatings, tint levels, and U-factor/SHGC targets) should be picked with orientation in mind, not just the catalog photo.
Key decisions to make before the window is ordered
Before anyone measures a rough opening, confirm the bay configuration (common options include a large picture center with two operable flanking windows, or three operables), the projection depth, and whether you want a box bay or angled bay. Then lock down practical items that affect lead time and installation: interior stool/seat height, exterior trim profile, screen type, hardware finish, and egress or ventilation requirements if the bay is near sleeping areas. If you’re coordinating with siding and stucco, clarify where the flange will sit relative to the final exterior plane so trim and waterproofing layers don’t fight each other.
It’s also worth deciding how you want the bay to function. If you want real airflow, casements on the sides can catch breezes better than sliders in many locations. If the bay faces strong afternoon sun, ask about glass packages that reduce heat gain without making the room feel dim. These choices are easier, and often less expensive, to get right before ordering than to correct after the unit arrives on site.
Installation checkpoints that prevent leaks and callbacks
A quality install should include a leveled and squared opening, shimming at structural points (not random gaps), and an intentional flashing sequence that ties into the WRB. For bays, confirm that the head flashing is integrated properly and that the underside is protected so wind-driven rain can’t migrate back toward the sheathing. The installer should also seal interior air gaps appropriately (without overfilling and bowing frames), verify smooth operation of all sashes, and confirm the bay is supported per manufacturer specs, support is not optional, and “it feels solid” isn’t the same as engineered support.
After installation, do a quick reality check before drywall and finish work: open and close each operable panel, check sightlines for any twist, and inspect exterior caulk lines only after trim is complete (caulk should complement flashing, not replace it). For new construction window installation in Roseville, the goal is a bay that looks intentional from the street, stays comfortable through summer heat, and avoids moisture issues when the first heavy storms hit.
If you’re coordinating a bay window upgrade during a build, consider scheduling a short pre-install meeting with the window team and your framer/siding crew. Aligning rough opening dimensions, projection depth, and waterproofing responsibilities up front can save days of rework, and helps ensure your bay window becomes a favorite feature, not a punch-list problem.
Learn more on our website home page, and see additional guidance from NFRC.
New construction window installation roseville is worth looking at based on your goals, budget, timing, and the kind of service or product you actually need.
New construction window installation roseville is worth comparing carefully before you choose the right provider, service, or product.
For more helpful reading, see our New construction window installation roseville article guide.
Ready to take the next step? Request your free consultation on our estimate page and see how Roseville Replacement Window Contractors can help to find the perfect solution for your needs.